The 2 AM Strip-and-Remake Nightmare
It's the middle of the night. Your kid is standing next to you, pajamas soaked, crying. You stumble to their room and realize you've got to strip the entire bed, find clean sheets, remake everything, and somehow get everyone back to sleep. The whole thing takes 20 minutes you don't have.
This is the part of night training nobody warns you about. Your child's mattress setup can make the difference between a quick 3-minute swap and a full bedding overhaul at 2 AM.
The good news? There's a better way to set up the bed. And it costs less than you'd think.
The Double-Layer Method: Your New Best Friend
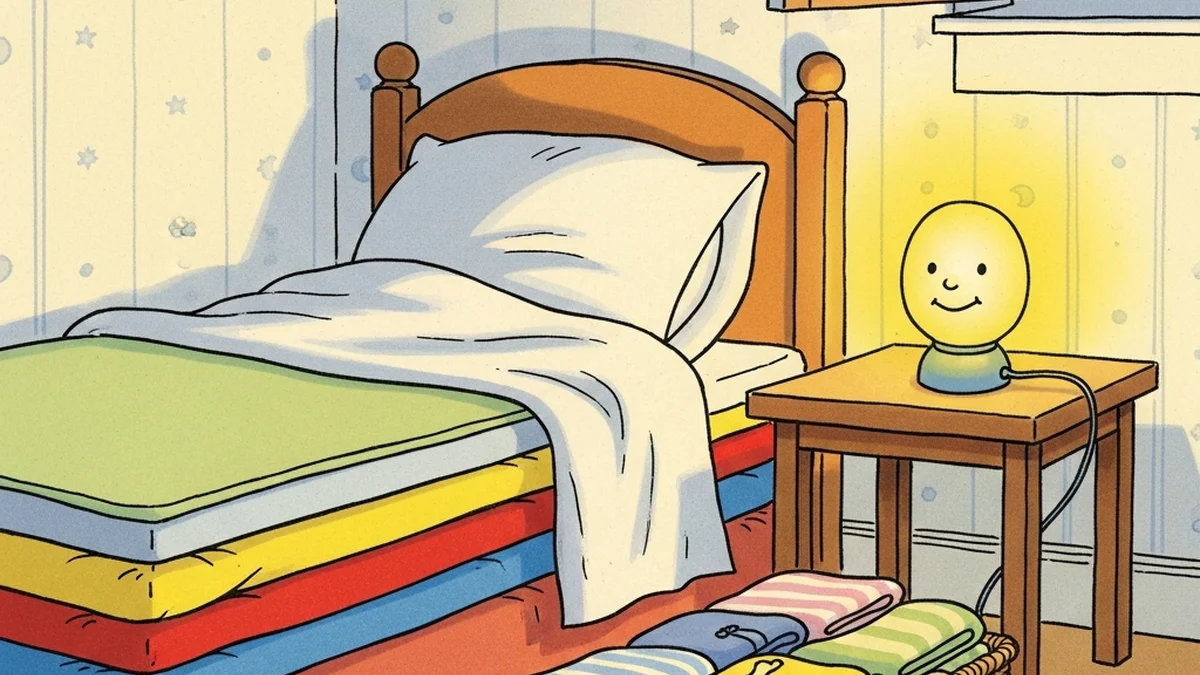
This is the single most useful trick for night training, and it takes about 5 minutes to set up. Here's what you do:
- Start with a waterproof mattress encasement that zips around the whole mattress. This is your insurance policy. Even if everything else fails, the mattress stays dry.
- Add a fitted sheet on top of the encasement.
- Add a second waterproof pad on top of that fitted sheet. A flat pad that covers the sleeping area works fine here.
- Add a second fitted sheet on top of that pad.
When an accident happens, you pull off the top sheet and pad. There's already a clean, dry layer underneath. No remaking. No hunting for sheets in the dark. Three minutes, tops.
Some parents add a third layer for especially frequent wetters. That's fine too.
What to Look for in a Waterproof Protector
Not all waterproof protectors are the same. Some will leave your kid sweating, some will slide off the mattress by midnight, and some will fall apart after five washes. Here's what actually matters:
Breathability
Avoid vinyl or plastic-backed protectors if you can. They trap heat, and a hot, sweaty kid sleeps worse and often wets more. Look for protectors with a polyurethane laminate (PUL) backing instead. PUL blocks liquid but lets air through. Your child stays cool and the mattress stays dry.
Fit and Grip
A protector that bunches up or slides off defeats the purpose. Look for deep pockets and elastic edges that wrap under the mattress. If your child's a restless sleeper, a fitted protector beats a flat pad for the bottom layer. Flat pads work great as the second layer since they're faster to pull off.
Washability
You'll wash these a lot. Choose protectors rated for machine washing at 40°C or higher. Skip fabric softener because it breaks down the waterproof coating over time. Tumble dry on low heat or line dry.
Budget-Friendly Alternatives That Work
You don't need to spend $50 per protector. Here are some options that parents swear by:
- Reusable incontinence pads: These flat, washable pads run about $10 to $15. Place one across the middle of the bed where your child sleeps. They catch most accidents and wash easily.
- Crib-size waterproof pads: If your kid's still in a toddler bed, crib mattress pads fit perfectly and cost less than full-size protectors.
- PUL fabric by the yard: Some parents buy waterproof PUL fabric and cut it to size. It's the same material used in cloth diapers, and a yard costs around $12.
Skip the disposable bed pads if you can. They crinkle, they slide, and the cost adds up fast when you're going through one or two a night.
Setting Up the Rest of the Room
The mattress setup is half the battle. The other half is making sure everything around the bed supports quick, calm middle-of-the-night changes.
Keep Supplies Within Arm's Reach
Put a small basket or bin near the bed with:
- Two clean pairs of pajamas
- Clean underwear
- A hand towel for quick wipe-downs
- A plastic bag for wet clothes
When accidents happen, you're not rummaging through drawers in the dark. Everything's right there.
Use a Nightlight
A dim nightlight in the bedroom and hallway makes a big difference. Kids who can see where they're going are more likely to get themselves to the potty in time. And if they don't make it, at least you can handle cleanup without turning on the overhead light and waking everyone up completely.
Consider a Portable Potty in the Bedroom
For kids between ages 2 and 4, a small portable potty next to the bed removes the biggest barrier to nighttime success: the walk to the bathroom. If your child wakes up and realizes they need to go, a potty that's 3 feet away is a lot more realistic than one that's down the hall.
When to Expect Dry Nights
Here's the honest truth: nighttime dryness is mostly about biology, not training. Your child's body needs to produce enough antidiuretic hormone (ADH) to slow urine production during sleep, and their brain needs to recognize a full bladder and wake them up.
Most kids achieve nighttime dryness between ages 3 and 5. About 15% of 5-year-olds still wet the bed, and that's considered normal by pediatricians. If your child is under 6 and still having wet nights, there's usually nothing wrong. Their body just isn't there yet.
That's why a good mattress setup matters so much. You might be using it for weeks or months. Make it easy on yourself.
Mistakes That Make Night Cleanups Harder
A few common missteps to avoid:
- Using only one sheet with no backup layer. You'll end up remaking the bed from scratch every time. The double-layer method eliminates this entirely.
- Skipping the mattress encasement. Even with pads and protectors, liquid can seep through seams and edges. A full encasement protects your investment in the mattress itself.
- Restricting fluids too aggressively. Cutting off all water after dinner doesn't prevent bedwetting. It just makes kids thirsty and anxious. Instead, front-load fluids earlier in the day and do a small reduction in the last 2 hours before bed.
- Getting frustrated in the moment. Your kid already feels bad. Keep the tone low-key and matter-of-fact. "No big deal, let's get you dry." That's all you need to say.
Key Takeaways
- Use the double-layer method (protector, sheet, protector, sheet) so you can peel off the wet layer and go back to sleep in under 3 minutes.
- Choose breathable PUL-backed protectors over vinyl to keep your child comfortable and cool.
- Keep a bedside basket stocked with clean pajamas, underwear, and a towel for fast nighttime swaps.
- Nighttime dryness typically happens between ages 3 and 5, so plan a setup you can maintain for the long haul.
- Stay calm during accidents. Your reaction shapes how your child feels about the process.
Frequently Asked Questions
How many waterproof protectors do I need for night training?
At minimum, you need two: one for the full mattress encasement and one for the top layer. If you're doing the double-layer method, three is ideal so you always have a clean spare in the rotation while others are in the wash.
Should I use disposable or reusable bed pads?
Reusable pads are better for most families. Disposable pads crinkle (which can wake light sleepers), slide around on the mattress, and cost $15 to $30 per month if your child is wetting nightly. Reusable pads pay for themselves within the first month.
My child sweats a lot with a waterproof protector. What can I do?
Switch to a protector with a PUL (polyurethane laminate) backing instead of vinyl. PUL is breathable and blocks liquid without trapping body heat. You can also use cotton or bamboo-topped protectors, which feel softer and absorb some moisture before it reaches the waterproof layer.
Does the double-layer method work on bunk beds and loft beds?
Yes, and it's actually even more important for raised beds because remaking them is so much harder. Use fitted pads with strong elastic for both layers since flat pads are more likely to shift on a bed you can't easily tuck things under.
When should I stop using waterproof protection on the mattress?
Keep the full mattress encasement on permanently. It protects against spills, sweat, and dust mites long after night training is done. You can drop the extra layers once your child has been consistently dry for 4 to 6 weeks straight.